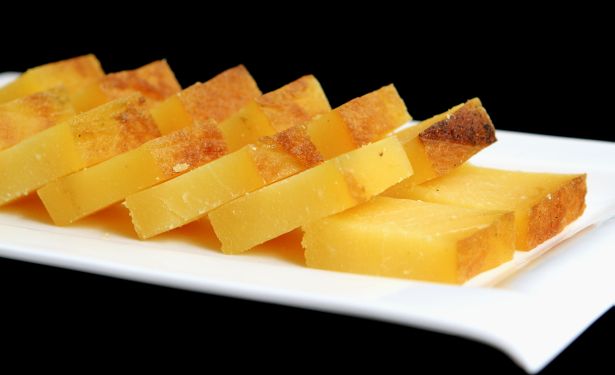
Recipe Description
Welcome, Kuali Bakers! This time, we are showcasing all the most ‘terer’ Malaysian-themed burnt cheesecake submissions here! To enter our giveaway, all you need to do is serve up your most ‘terer’ Malaysian-themed burnt cheesecake using Anchor Cream Cheese, which is the key ingredient to a yummylicious silky burnt cheesecake. Read our full instructions here to win! This recipe is courtesy of Dinie Zaini for the “Burnt Cheesecake, Let’s Make It Malaysian-lah!” Contest.
This recipe is best with

Recipe Ingredient
- 250g Anchor Cream Cheese
- 75g Castor sugar
- 2 Large eggs
- 125mll Anchor Whipping Cream
- 8g Flour
- 2tbs Rose syrup
- 1tsp Pink or red colouring
Instructions
- Preheat the oven at 200c.
- In a bowl, beat the cream cheese with castor sugar until smooth.
- Add eggs one at a time and beat until all are well combined.
- Add whipping cream and continue to beat until mixed.
- Add flour and make sure there are no lumps.
- Split the mixture into two bowls. In the first bowl, add the rose syrup and colouring. Leave the other one to remain plain.
- Prepare baking paper in the pan and pour the plain mixture just to cover the base of the pan (don't put all the mixture because we will be using it to make more layers).
- Bake the first layer in 180c upper heat for 5 minutes.
- When the first layer's surface is cook, pour the syrup mixture as our second layer. Pour it slowly and carefully so that it will become with beautiful layer without disrupting the first layer. Pour it as much as needed to cover the first layer.
- Bake the second layer in 180c upper heat for 5 minutes.
- Repeat Step 9 until the mixture has been finished. Make sure the top layer is the syrup colouring mixture because we are making the "Kueh Lapis cake".
- As for the last step of cooking, change the heat from upper to below heat and bake for another 15 minutes or until the surface become darker.
- Let the cake lower it's temperature before take it off the pan.
- Ready to be served.